Tuesday, February 11, 2020

Mixing it up

One of my favorite quotes about painting model horses comes from Jennifer Scott. She says: Every medium has a super power. Use it. An in fact, most model horse painters are mized media artists, at least to some degree. In this installment of Allie Davidson's guest post, What Should I Use to Paint My Model? we talk with two artist who are known for their airbrushing, but as you will read, the airbrush is but one took in their painting arsenal. Thank you, Allie, DeeAnn and Karen!

DeeAnn Kjelshus – Art by DeeAnn
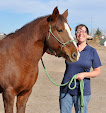
DeeAnn Kjelshus with her 2020 NaMoPaiMo horse
I like to use acrylic paints on my custom and resin horses. Most often, I use them in combination with pastels, colored pencils and oil paints. Acrylics are versatile and have many advantages along with a few disadvantages. 
A group of horses by DeeAnn Kjelshus
One of their many advantages is that they are water based. Therefore, they can be thinned down with water. In addition to thinning with water they can also be cleaned off brushes with soap and water. This can be a deal maker if you don’t like the smell or mess of solvents needed to clean off oil paints. Another advantage is that they dry quickly, so there is no need to wait between painting sessions for paint to dry. They will not reactivate when you paint over them, like water colors and oils which may bleed when painted over. You may also safely ship or travel your pieces when they are dry enough more quickly than with a piece painted with traditional oil paints. 
Catalina resin by DeeAnn Kjelshus
A disadvantage to them drying so quickly is that they cannot easily be blended using the “wet on wet” technique as you would with oil paints. Acrylics will also dry quicker on the palette. You can, however, add a retarder to slow the drying time and allow you more time to work while the paints are still wet. (Jennifer: a wet palette can keep your paints usable for several hours or more). I enjoy working with acrylics in an airbrush as well as hand painting. I use them several different ways with different media.
Breyer mini Alborozo by DeeAnn Kjelshus
I often airbrush them as a base coat for my oil paints, adding some basic shading with acrylics first. I will also base coat them for pastels, and then go back and forth with washes over the pastels to get the affects I desire. I also love dry brushing with acrylics, it can give certain affects that I have not been able to achieve with other media. 
Valor resin by DeeAnn Kjelshus
I would highly recommend acrylics to any artist. I believe they are a very useful and versatile choice.
Karen Zorn/Zorn Art Studio

I do finishwork on horses with airbrushed basecoats, then and hand-created hair detail with colored pencils, and hand-painted patternwork in dilute white acrylic. I use smidgens of panpastels for noses, ermine spots, softening small areas, and mane/tail tips.
Karen Zorn's 2019 Best Customs Contest Finishwork winner
I prefer the airbrush, mine are Iwata Custom Micron Bs, to attain a smooth and glowing coat. Each different coat color is created with layers (up to 12 or 15) done in custom-mixed Golden High Flow acrylic. Every few layers, the horse needs to dry and cure for a few days, then be sealed. I use Krylon Flat Clear as a working sealer, and Testor’s Dulcote as a final lacquer.
Eberl Cobra mare by Karen Zorn
Pros: water cleanup, smooth application, no three-week curing time at the end.
Cons: airbrushing well without grain or spatter takes a lot of practice since airbrushes can be extremely fussy about the viscosity and the air pressure powering them. Replacing parts that wear or get accidentally damaged can be expensive. Horse-colors in the ready-to-use Golden High Flow line are pretty limited, and you have to mix up your own formulas.
Mini Khemosabi by Karen Zorn
Colored Pencil hair detail can create very soft-looking haircoats. I generally start with a darker airbrushed basecoat and work the coloring up with the pencils. The difficulty is the patience required to do numerous layers of tiny light hairs in the direction of the horse’s haircoat. Multiple colors of pencils are used to give the depth of color. Each layer of pencils must be sealed and completely dried (at least 24 hours) before continuing with more layers. Some kinds of artist’s colored pencils can seem to disappear a bit when sealed (PrismaColor VeriThins and Polychromos oil based pencils are the main culprits.) Caran D’Ache Pablos are a nice brand to use as well.

Pros: easy control, and PrismaColor Premiers are inexpensive and readily available.
Cons: The urge to press down too hard will result in poor line quality that doesn’t want to stick to the horse. Use an extremely light sketching action. Layering is required, often 6-8 layers of hairs all over the entire horse. You must keep your pencil points extremely sharp, a good precision manual crank drafter’s pencil sharpener is important to have. You’ll go through a lot of pencils to keep them razor sharp.
Fritz by Karen Zorn
White patterning
I like to use Golden Titanium White, in a soft-body tube diluted with Golden Airbrush Medium; or in the High Flow Line. Sometimes it can be hard to get the first layer of the thin white paint to stick to the sealer over your basecoat. Just keep moving the paint around in small areas at a time and it should adhere. If you really get in a jam, add a tiny dot of gesso. Finding the correct thickness of the white paint is really a matter of personal preference. The first bunch of layers on your pattern will look weird and amateur, and you will think “This will never work!” but if you allow each thin layer to dry, you will be able to apply many many layers on top to make the white opaque and brush-stroke free.

Paintbrushes: a use a cheap Michael’s brand round for covering larger areas. For detail, I prefer the really tiny 00000 round and liner brushes in sable if you can find them, and they can be pricey. There are some decent tiny synthetic sables done by Windsor and Newton as well as a company called AIT (those were found on Amazon).

Monday, February 10, 2020

Fabian's painting party

Speaking of NaMoPaiMo parties, Fabian's third annual painting party was held this past Saturday at his home in Thornton, Colorado. The guest list for the human party included Beth, Angelo, Regan, myself, Heather, Teresa, Teresa, Sharon and, of course, Fabian.
There was also a #TeamMinisPaintingMinis party. The guest list for this one was Treebeard, Sylvia, Captain Benjamin Sisko from Star Trek Deep Space Nine, Bob Ross and Jose.
There was cake...
and there were horses.
Angelo...
and Regan's horses got primed.
Sharon worked on her NaMoPaiMo horse...
and I worked on the Hornet I am probably never going to finish.

Painting parties are my favorite part of NaMoPaiMo. Thanks for having us again, Fabian. That was a good day!

Side projects: Margot

Last month, I attended a NaMopaiMo prepping party at Charlotte Pijnenburg's home in Middelbeers, the Netherlands.
photo by Charlotte Pijnenburg
There were a lot of horses on the table, and I couldn't help but notice that several of them were wearing cats. There's one... 
 and another!
I love model cats almost as much as I love model horses, so started asking questions. I learned they were Limpuu resins sculpted by Lea Magga and sold by Aleksander Freda.

"Okay," I thought. "I need to remember that for later."

Except it turned out, I didn't have to. I received my own little Limpuu the next day while I was visiting Anna Dobrowolska-Oczko's studio in Utrecht.
Limpuu was a nice clean cast, requiring very little prep, so I decided she would be a perfect warm-up project for NaMoPaiMo. Since I don't have a real kitty of my own, I turned to Facebook for color help.
Dozens of people submitted cat photos. It was hard to choose, but in the end I went with Heather Jackson-Lain's sweet girl, Maeve.
Here's my finished Limpuu. Her new name is Margot.
 And here she is on Maeve again. 
I'm so happy to have a cat for my horses to wear. Thank you again, Anna!

NaMoPaiMo so far

We're ten days in, and NaMoPaiMo is proceeding nicely.
Although most of us are still prepping,
photos by Celsie Rae Abelt and Kitty Grubka, meme by Missy Shaw
priming, 
photo by Erica Ferguson
painting...
photos by Ruth O'Donogue-Lowell, Shana Bobbit, Ola Noga, Kirsten Eidsmoe, Jody Wheeler and Em Meagher
and procrastinating,
photos by Jackie Rossi, Kay Buckle, Jennifer Buxton, Leah Bowen, Lauren Jensen and Sondra Householder
the number of finished horses has been growing steadily.
We've even had one member of the Class of 2020 make it to the show ring at last weekend's Sleigh Rally show.
Congratulations, Tiffany Purdy and Purdy Paimoass!
My main guy is currently hanging out on the drying rack...
so I've been busying myself with a whole bunch of side projects.
Ten down, nineteen to go. Can we paint them? I think we can!

Sunday, February 9, 2020

NaMoPaiMo stats

Thursday was database day. Ryan and I sat down and ran the numbers for NaMoPaiMo 2020. Here's the breakdown for this year's event.
Nine hundred thirty three people signed up to paint a horse with me this month. 
Twelve percent of us are fist time painters, ten percent are professionals and the vast majority falls somewhere in between.
  • First time painters - 115
  • Beginners - 319
  • Intermediates - 257
  • Advanced Amateur - 150
  • Professional - 92
Seventy one percent of the NaMoPainters live in the United States of America. The other twenty nine percent hail from twenty one countries and three continents.
  • United States - 669
  • United Kingdom - 69
  • Canada - 46
  • Germany - 33
  • Australia - 30
  • Poland - 17
  • the Netherlands - 15
  • Sweden - 15
  • Russia Federation - 7
  • France -6
  • Finland - 4
  • Czech Republic - 3
  • New Zealand - 3
  • Austria - 3
  • Norway - 3
  • Spain - 2
  • Scotland - 2
  • Bulgaria - 1
  • Slovenia - 1
  • Italy - 1
  • Wales - 1
  • Denmark - 1
As always, there are a lot of Jennifers. This year, however, there are an equal number of Sarahs. Teams Amanda, Heather and Laura are also mighty, with ten members each.
  • Jennifer - 13
  • Sarah - 13
  • Amanda - 10
  • Heather - 10
  • Laura - 10
  • Jessica - 8
  • Sara - 7
  • Donna - 7
  • Emma - 7
  • Kelly - 7
  • Melissa - 7
  • Stephanie - 6
  • Beth - 6
  • Karen - 6
  • Lauren - 6
  • Lisa - 6
  • Katie - 5
  • Rachel - 5
  • Julie - 5
This is the first year we collected real age data on event participants. All the age groups are nicely represented, but there's room for growth, particularly with the younger crowd.
  • Under 12 - 53
  • 12-20 - 151
  • 21-40 - 436
  • 41 and over - 293
Finally, approximately seventy seven percent of the entrants chose to pay the optional entry fee. Thank you so much, especially to those  who sent more than two dollars. Your generosity makes NaMoPaiMo possible!

Monday, February 3, 2020

Painting with pastels

Part three of Allie Davidson's "What Should I Use to Paint My Model?" focuses on pastels and pigments. Thank you, Allie, Stephanie and T.J. for sharing your knowledge with us!

Stephanie Blaylock
Up to trying something new for NaMoPaiMo? I suggest Pan Pastels! Here’s my entire palette that I own:
  • Black
  • Yellow Ochre Tint
  • Yellow Ochre
  • Burnt Sienna
  • Burnt Sienna Shade
  • Red Ironoxide Ex Dark
  • Raw Umber
  • Paynes Grey
  • Titanium White
Stephanie's Pan Pastel collection
I’ve found this will create every color I need. I enjoying mixing pastels with acrylics but you can get a really lovely finish with just pastels as well.
Bennett resin painted by Stephanie Blaylock
Here are a few tips:
  • Go light to dark layering your colors.
  • Use separate brushes for light and dark colors. You will need to seal colors in between the layers. I recommend Krylon GLOSS Crystal Clear for the first smoothing layer and then Testor’s Dullcote for the rest.
  • Pastels are applied with scruffy brushes. Brushes that you have trimmed down with scissors. You make a circular motion to apply. The stiffer the brush the heavier the color applies. Too stiff and you can scrape your sealer off. I like a medium bristle brush.
  • Think of shading as you apply. For instance, if you apply every color right on top of the last you just get a solid color horse. You want to leave softer areas such as the throat-latch, gaskin, elbows and then pastel other areas more dramatic like cheeks, poll, shoulders, haunches.
  • The average horse is five to eight layers. The lighter the horse is the less you layer. One neat trick is using your white or grey to lighten areas such as the muzzle.
Some of Stephanie's brushes
Everything can be fixed and there’s no one way to do it. Practice is the best way to become really fluent in pastels. I love that they mix well with other mediums. My favorite mix is acrylics with some colored pencil.
Trick medallion painted by Stephanie Blaylock
I order my supplies online from retailers like Blick. Pan Pastels last forever if you’re careful not to mix color and are completely worth the investment.  There’s also less dust and mess.  Honestly the hardest thing is screwing the lids back on the plastic jars. (Allie: I thought I was the only one who had a hard time screwing the lids back on!)

Extra things to make your pastel choice easier... hand wipes so colors don’t transfer, paper plates, & paper towels. I also use an acrylic gloss glaze such as Liquitex for eyes.

Breyer G1 stablemates painted by Stephanie Blaylock
Pastels create a very soft look by layering color. It’s difficult to get the same effect with other mediums.  I painted my NaMoPaiMo Breyer Finish-work winner layering pastels and acrylics.  Also, it’s beginner friendly with a minimal startup cost. So get out those primed-in-white horses and get started!
Stephanie Blaylock's 2018 NaMoPaiMo horse and winner of the Breyerfest Best Customs contest for in Finishwork Excellence.

TJ Hurst

(Allie: I was thrilled to have TJ respond to my inquiry.  Her appaloosas are some of the best in the hobby.  The attention to the smallest detail makes them look like the color was magically lifted off a real appaloosa and attached to a model.  Although pastels are beginner friendly TJ’s technique demonstrates an advanced application.)

I paint only Appaloosas and have found that pastels (both stick and pan types) and earth pigments work best for me and my style and technique.
I use a "stippling" effect to apply the pastels, using micro mini-brushes, and rubber tipped paint erasers. I always start with a plain white "canvas," letting the primer be my base coat. Next I apply the pinks to inside the ears, muzzle, eyelids and genital areas. (I do use a small soft brush for this) and seal. Then I start adding med to dark gray over the pinks for the mottling. I generally rough in the whole Appy pattern in light and dark grays before the coat color begins. For heavy roaning, I just dab short, small strokes/dots of pastel in a random way, leaving white showing through, being careful to follow the direction of hair flow. Then for the next layers I do the same - much like the hair by hair technique artists use with paint, but SO much faster. It is more "impressionistic" than "realistic" but gives the look of roaning as well. Then I just keep adding layers of color, working toward the desired effect, always working light-to-dark with the pastels.
I like pastels because I can do multiple layers really fast, not having to wait for paint to dry. I do paint the eyes and chestnuts with acrylics though.

Sunday, February 2, 2020

Off and running

Yesterday was the first day of NaMoPaiMo. 
Hobbyists across the globe woke up early and went to work.
Theresa Johnson, Caroline Jones, Curtis Sayers and Holly Jane Mason
Although some of us are still customizing...
Anne van der Weel's Bristol in progress on one side of the table, boyfriend, Martin on the other
and prepping...
*this* close to being done
a lot of people are actually painting their horses.
model by Kim Stevens
This one looks great already!
model by Cynthia Wyatt Briley
There have been a few tragedies along the way, but mostly it seems to be going well.
Sarahbeth Barlas' broken leg pony
Welcome to NaMoPaiMo, everyone. It's going to be a great month!